
Concept, Script and Visual Development of The Frog Prince

Stage 1 - The Story breakdown
The first step when my group and I were assigned our fairytale to adapt was to find the core story and break down the events into a clear beginning, middle and end.
The Frog Prince has three clear stages so it was nice and easy to divide. The first scene sets up the princess, her golden ball and the deal she and the frog makes ends when she heads back to the palace, hoping the frog won't be able to follow her. The middle involves all the events from when the frog arrives at the palace gates in the morning, to after they finish their evening meal. We decided that the scene was a good way to establish the princess's emotions and we treated the scene as a montage.
The end is where they're going to bed and the prince promises to leave if he's given a kiss and when the princess kisses him she gets a magical surprise. We decided as a team that this would be the most drastically changed third of the story from the original fairytale as we added a twist ending where the frog becomes a prince but also passes on the curse he was under to the princess as revenge for her reluctance to keep her promises.
When adapting the story we all felt that the princess in the original fairytale was very reluctant and harsh towards the frog and wanted to push that characterization to the extreme. Because of this, we made her a surly and mean spirited character and the frog an optimistic and patient foil character.
When splitting the story, we were each put in charge of a third of it, I was assigned to draw and script the ending.


Stage 2 - Research
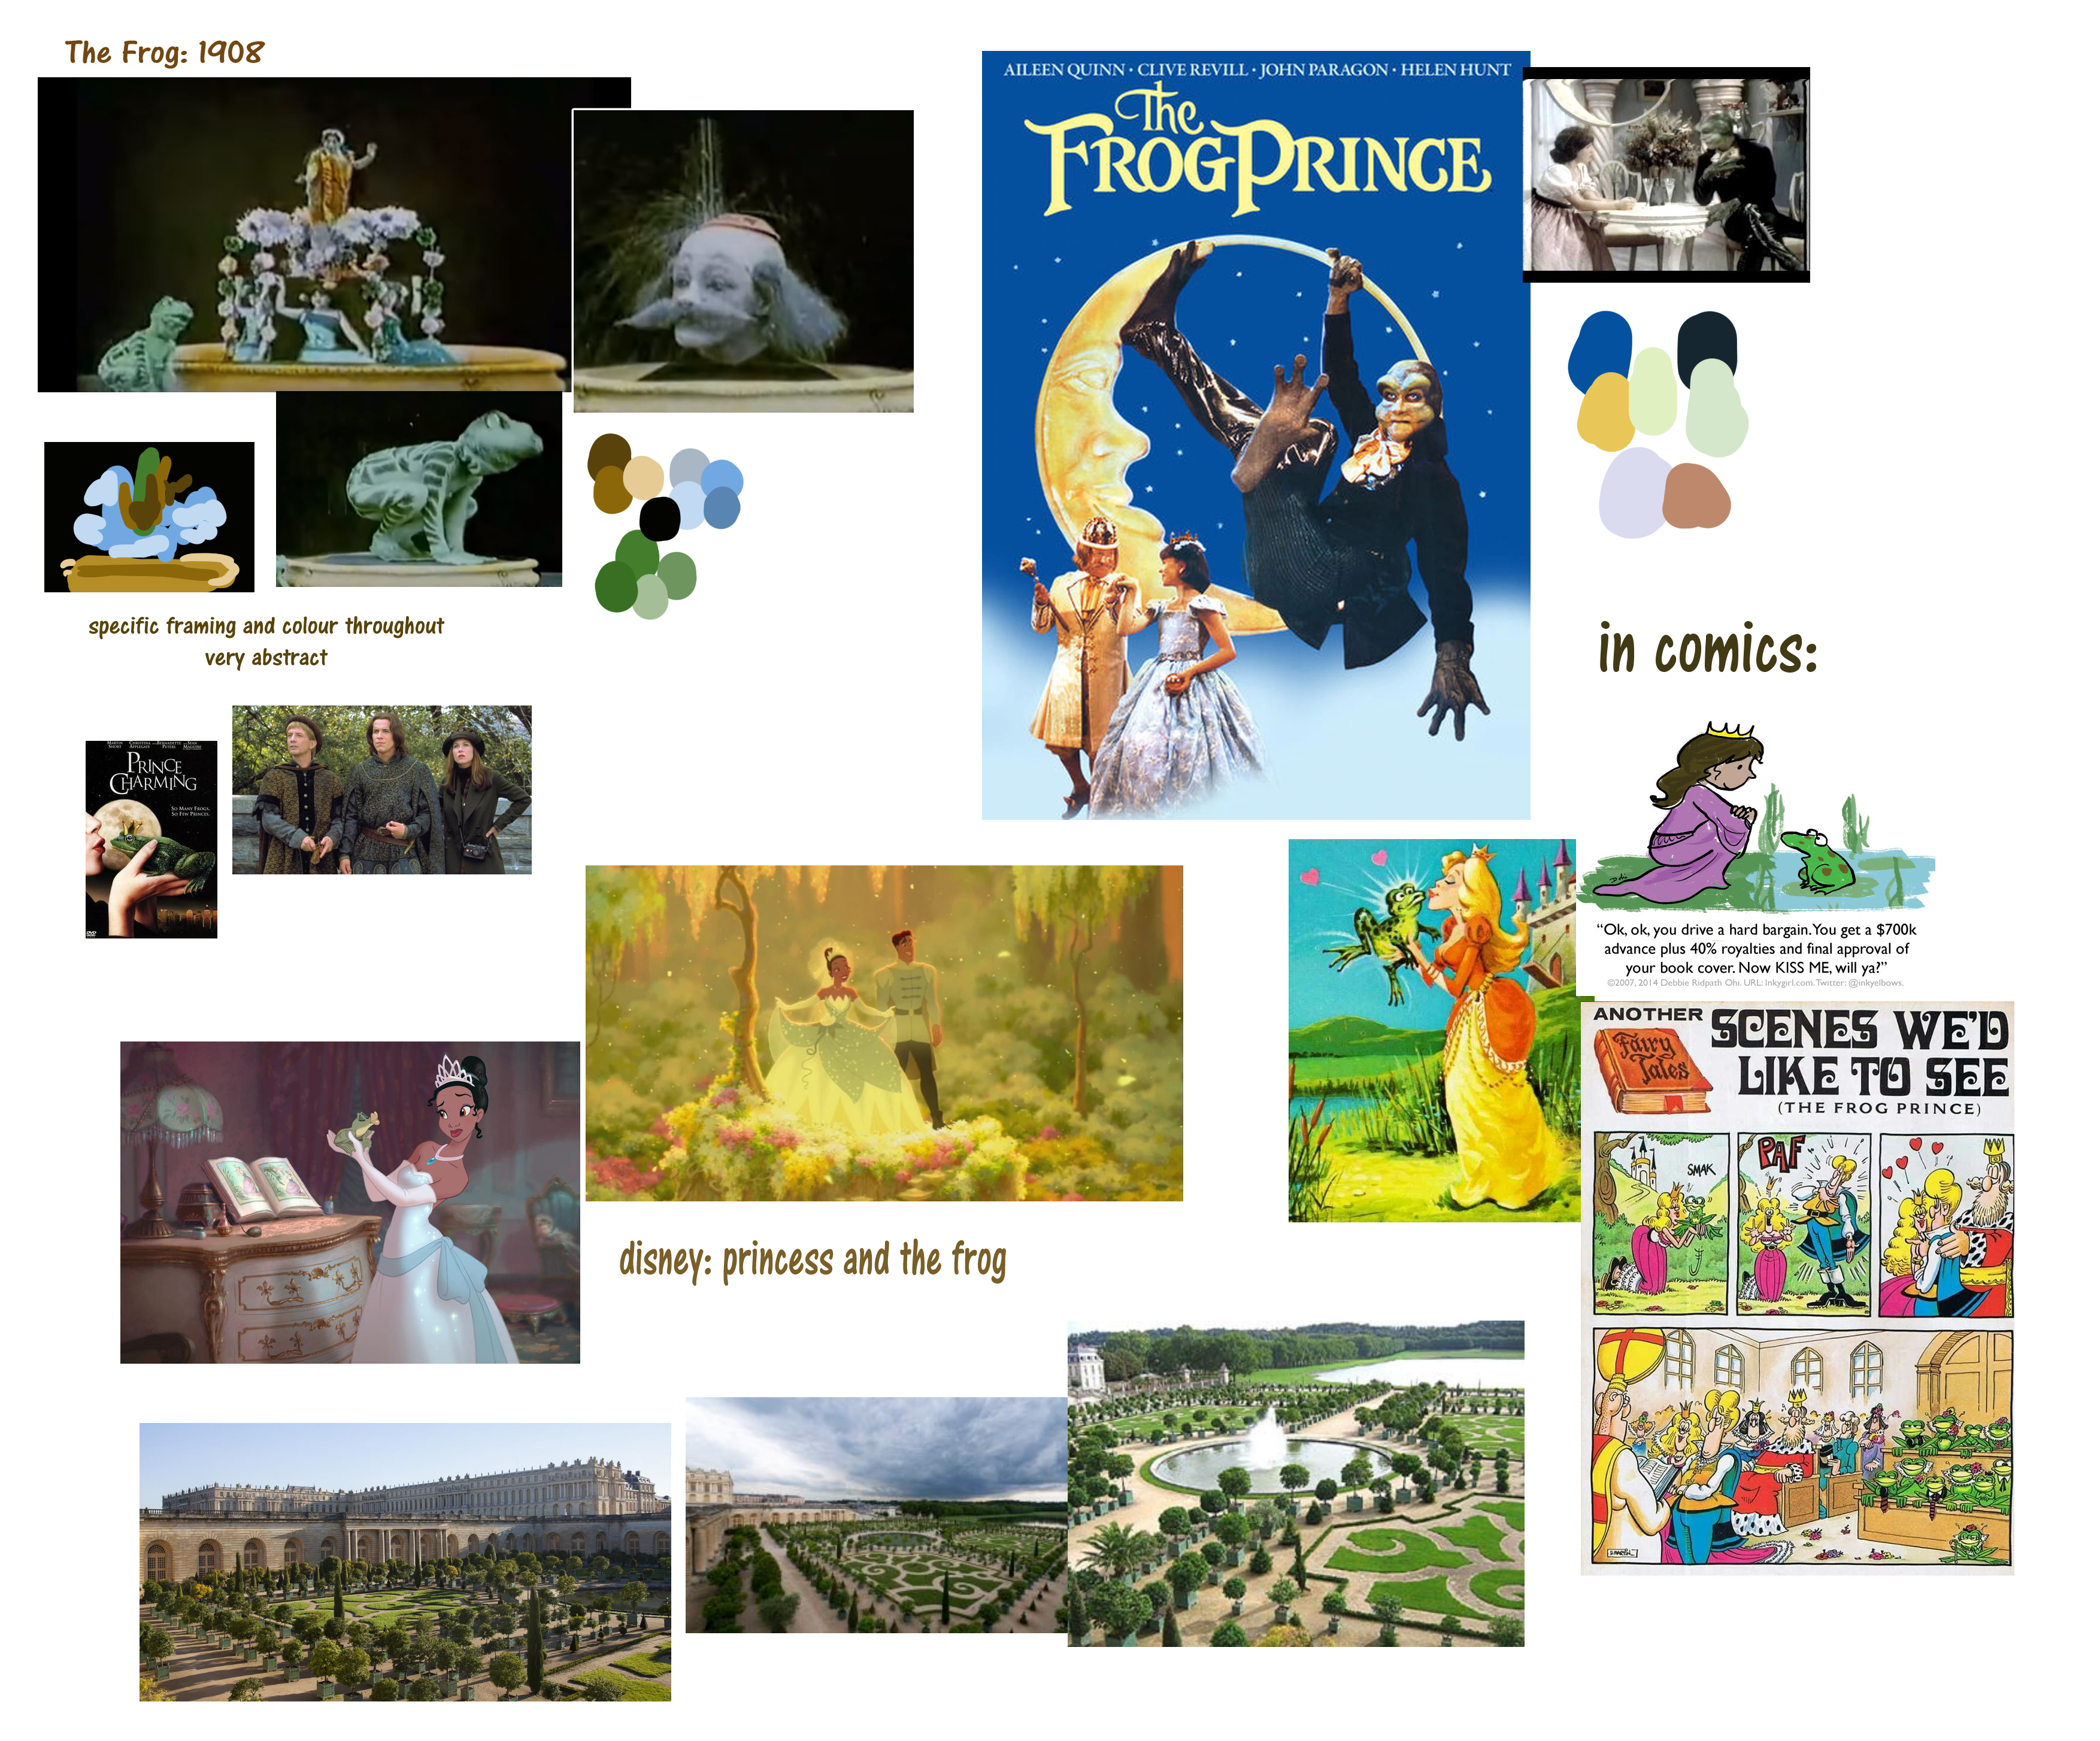
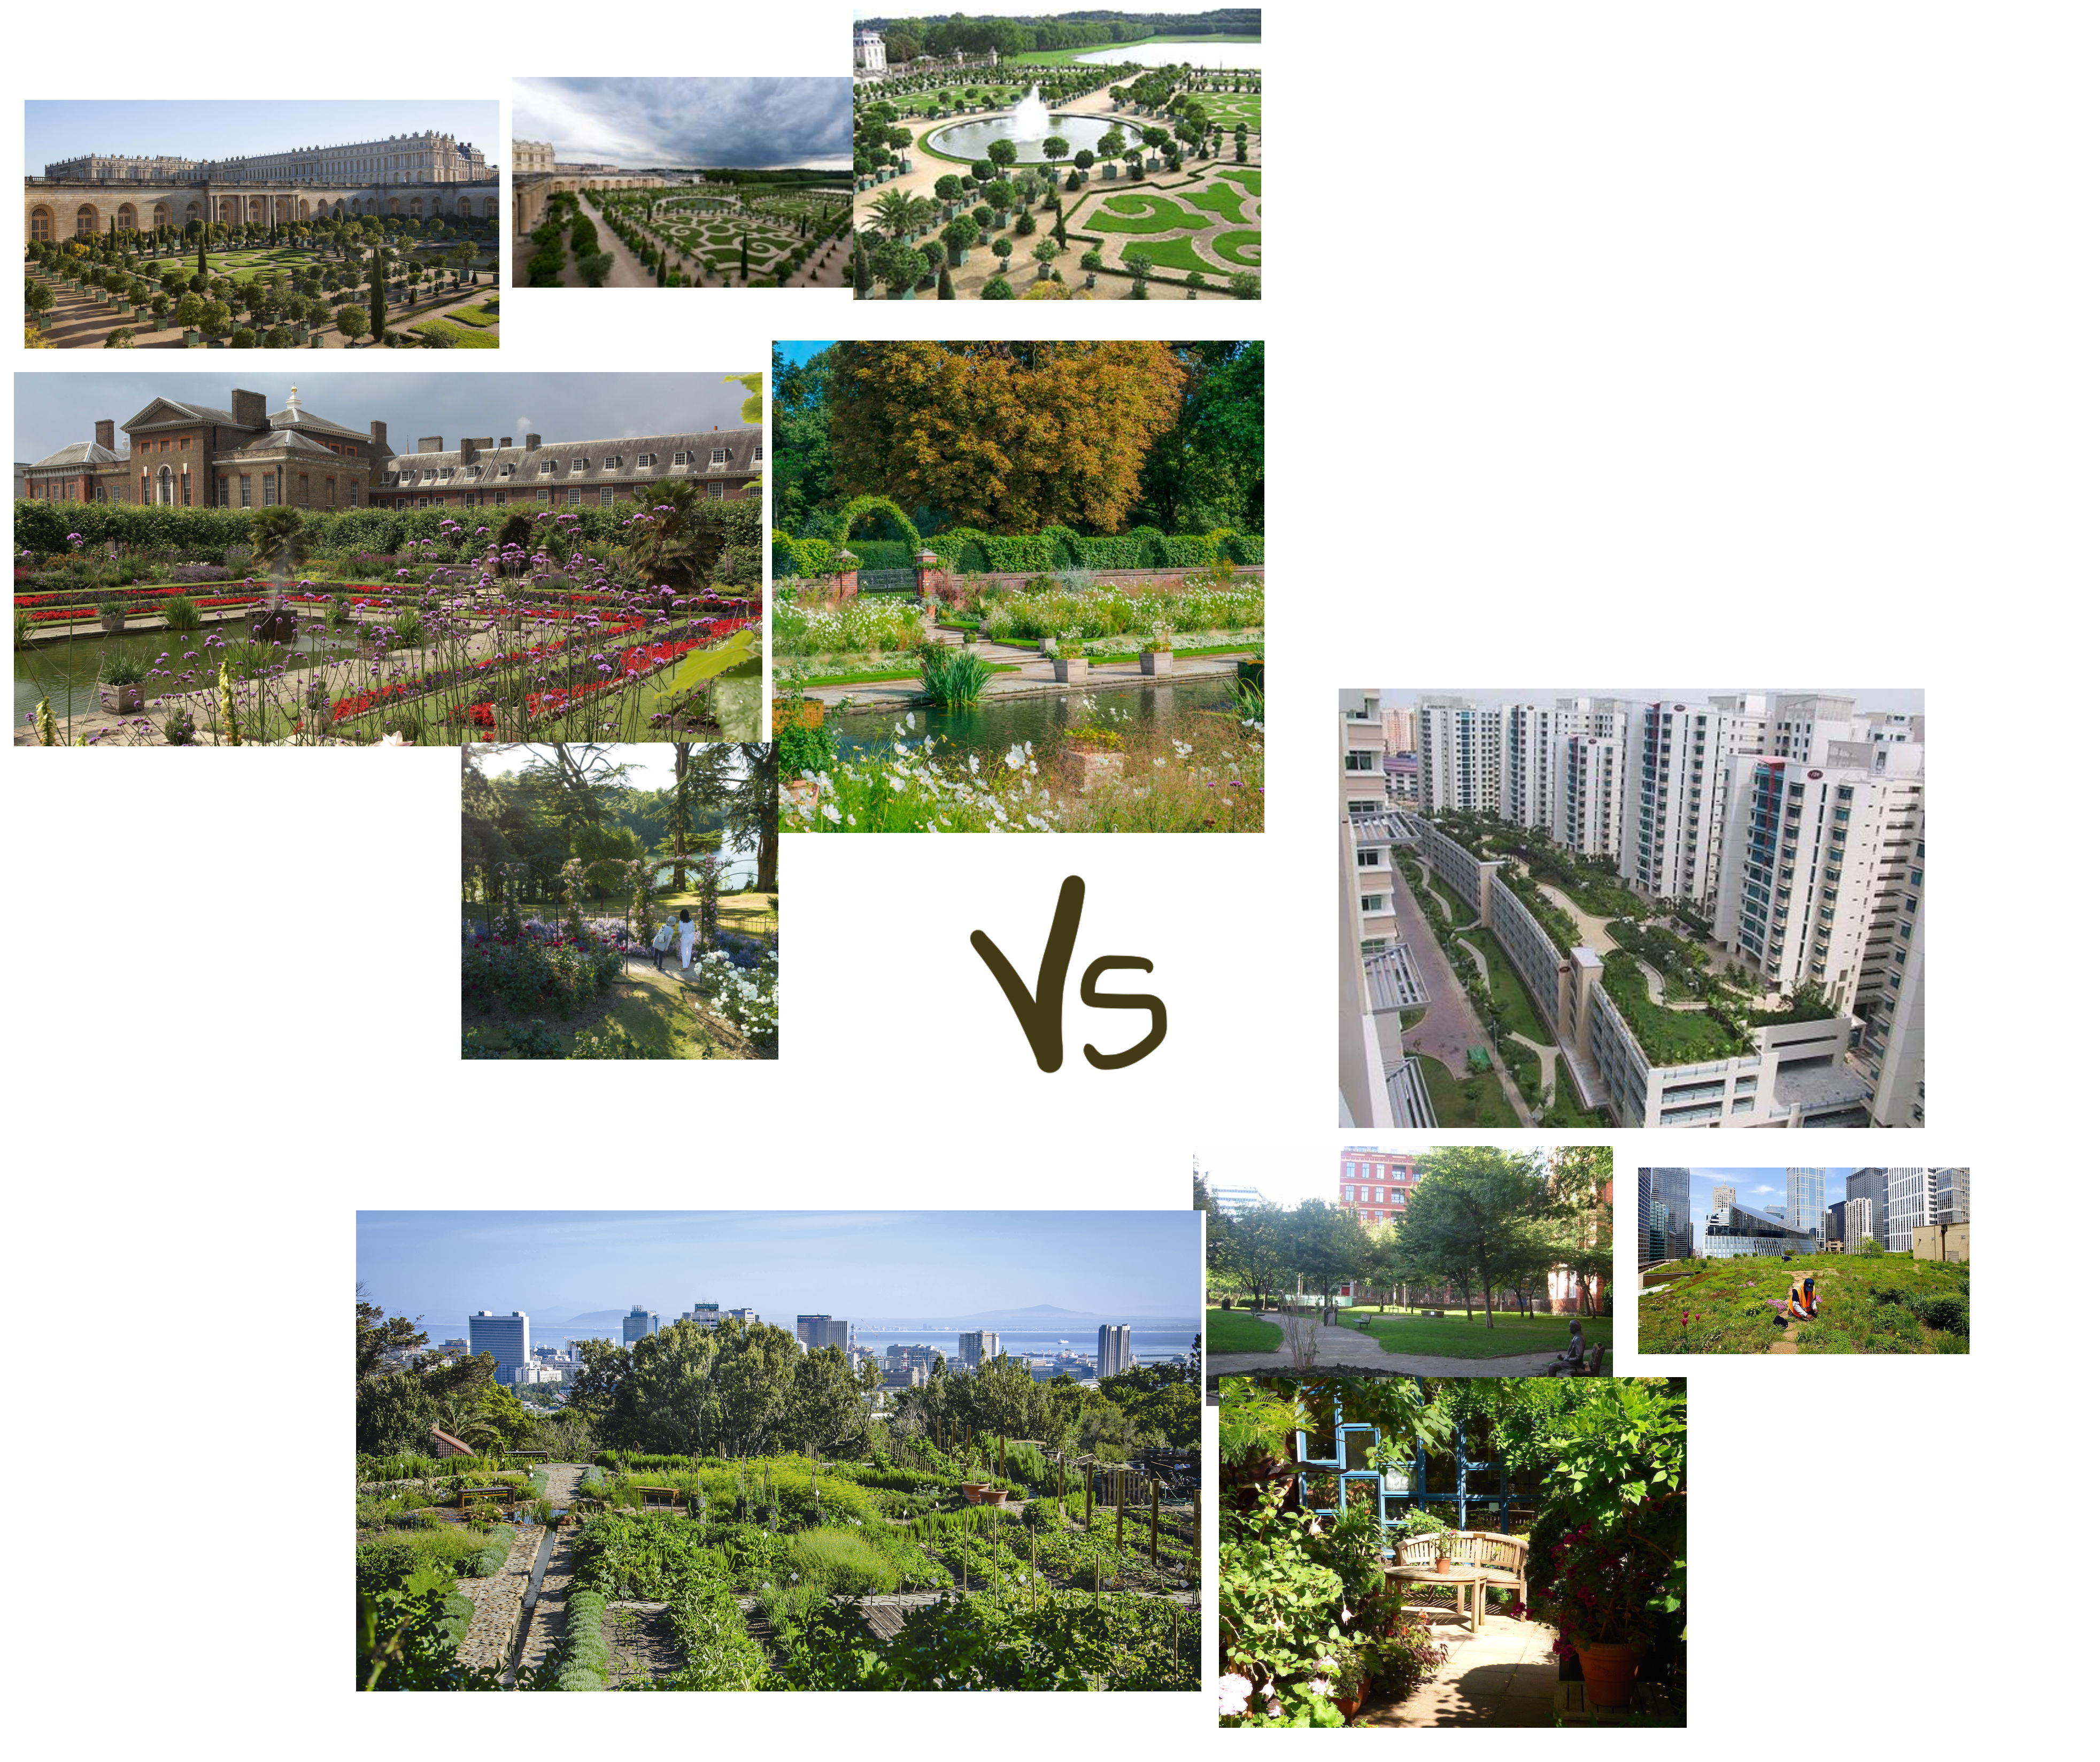
The next step was to individually do visual and story research on our subject. I decided to look into the film history of The Frog Prince alongside the architecture and aesthetics of french palace gardens as the opulent fountain at Versailles reminded me of the way the pond is portrayed in the 1908 film, The Frog. The Frog was the first time the Frog prince appeared in film and it's a story that isn't told very often.
I also looked at the 80's film The Frog Prince which had a humanoid frog and gave him a romantic personality, they also used gold and blue colors and gave the feeling of a masquerade to the film's aesthetic.
Looking at the most notable visit to the big screen this story has gotten, its Disney adaptation The Princess and the Frog, I saw how specific its setting was and decided to not draw too much from it since it gets very far away from the original story in a way that didn't fit with what our group wanted to do.
Stage 3 - Character Designs
This was definitely the fun part, in order to make sure our pages were able to make sense together we needed consistent character designs.
We decided the best thing to do was to make specific large features each character had that would make them recognizable and that if we had a unified color scheme that would also help the pages flow together.
We spent a session discussing our characters' personalities, body language and practicing drawing them together to make sure they had consistency.
visual development

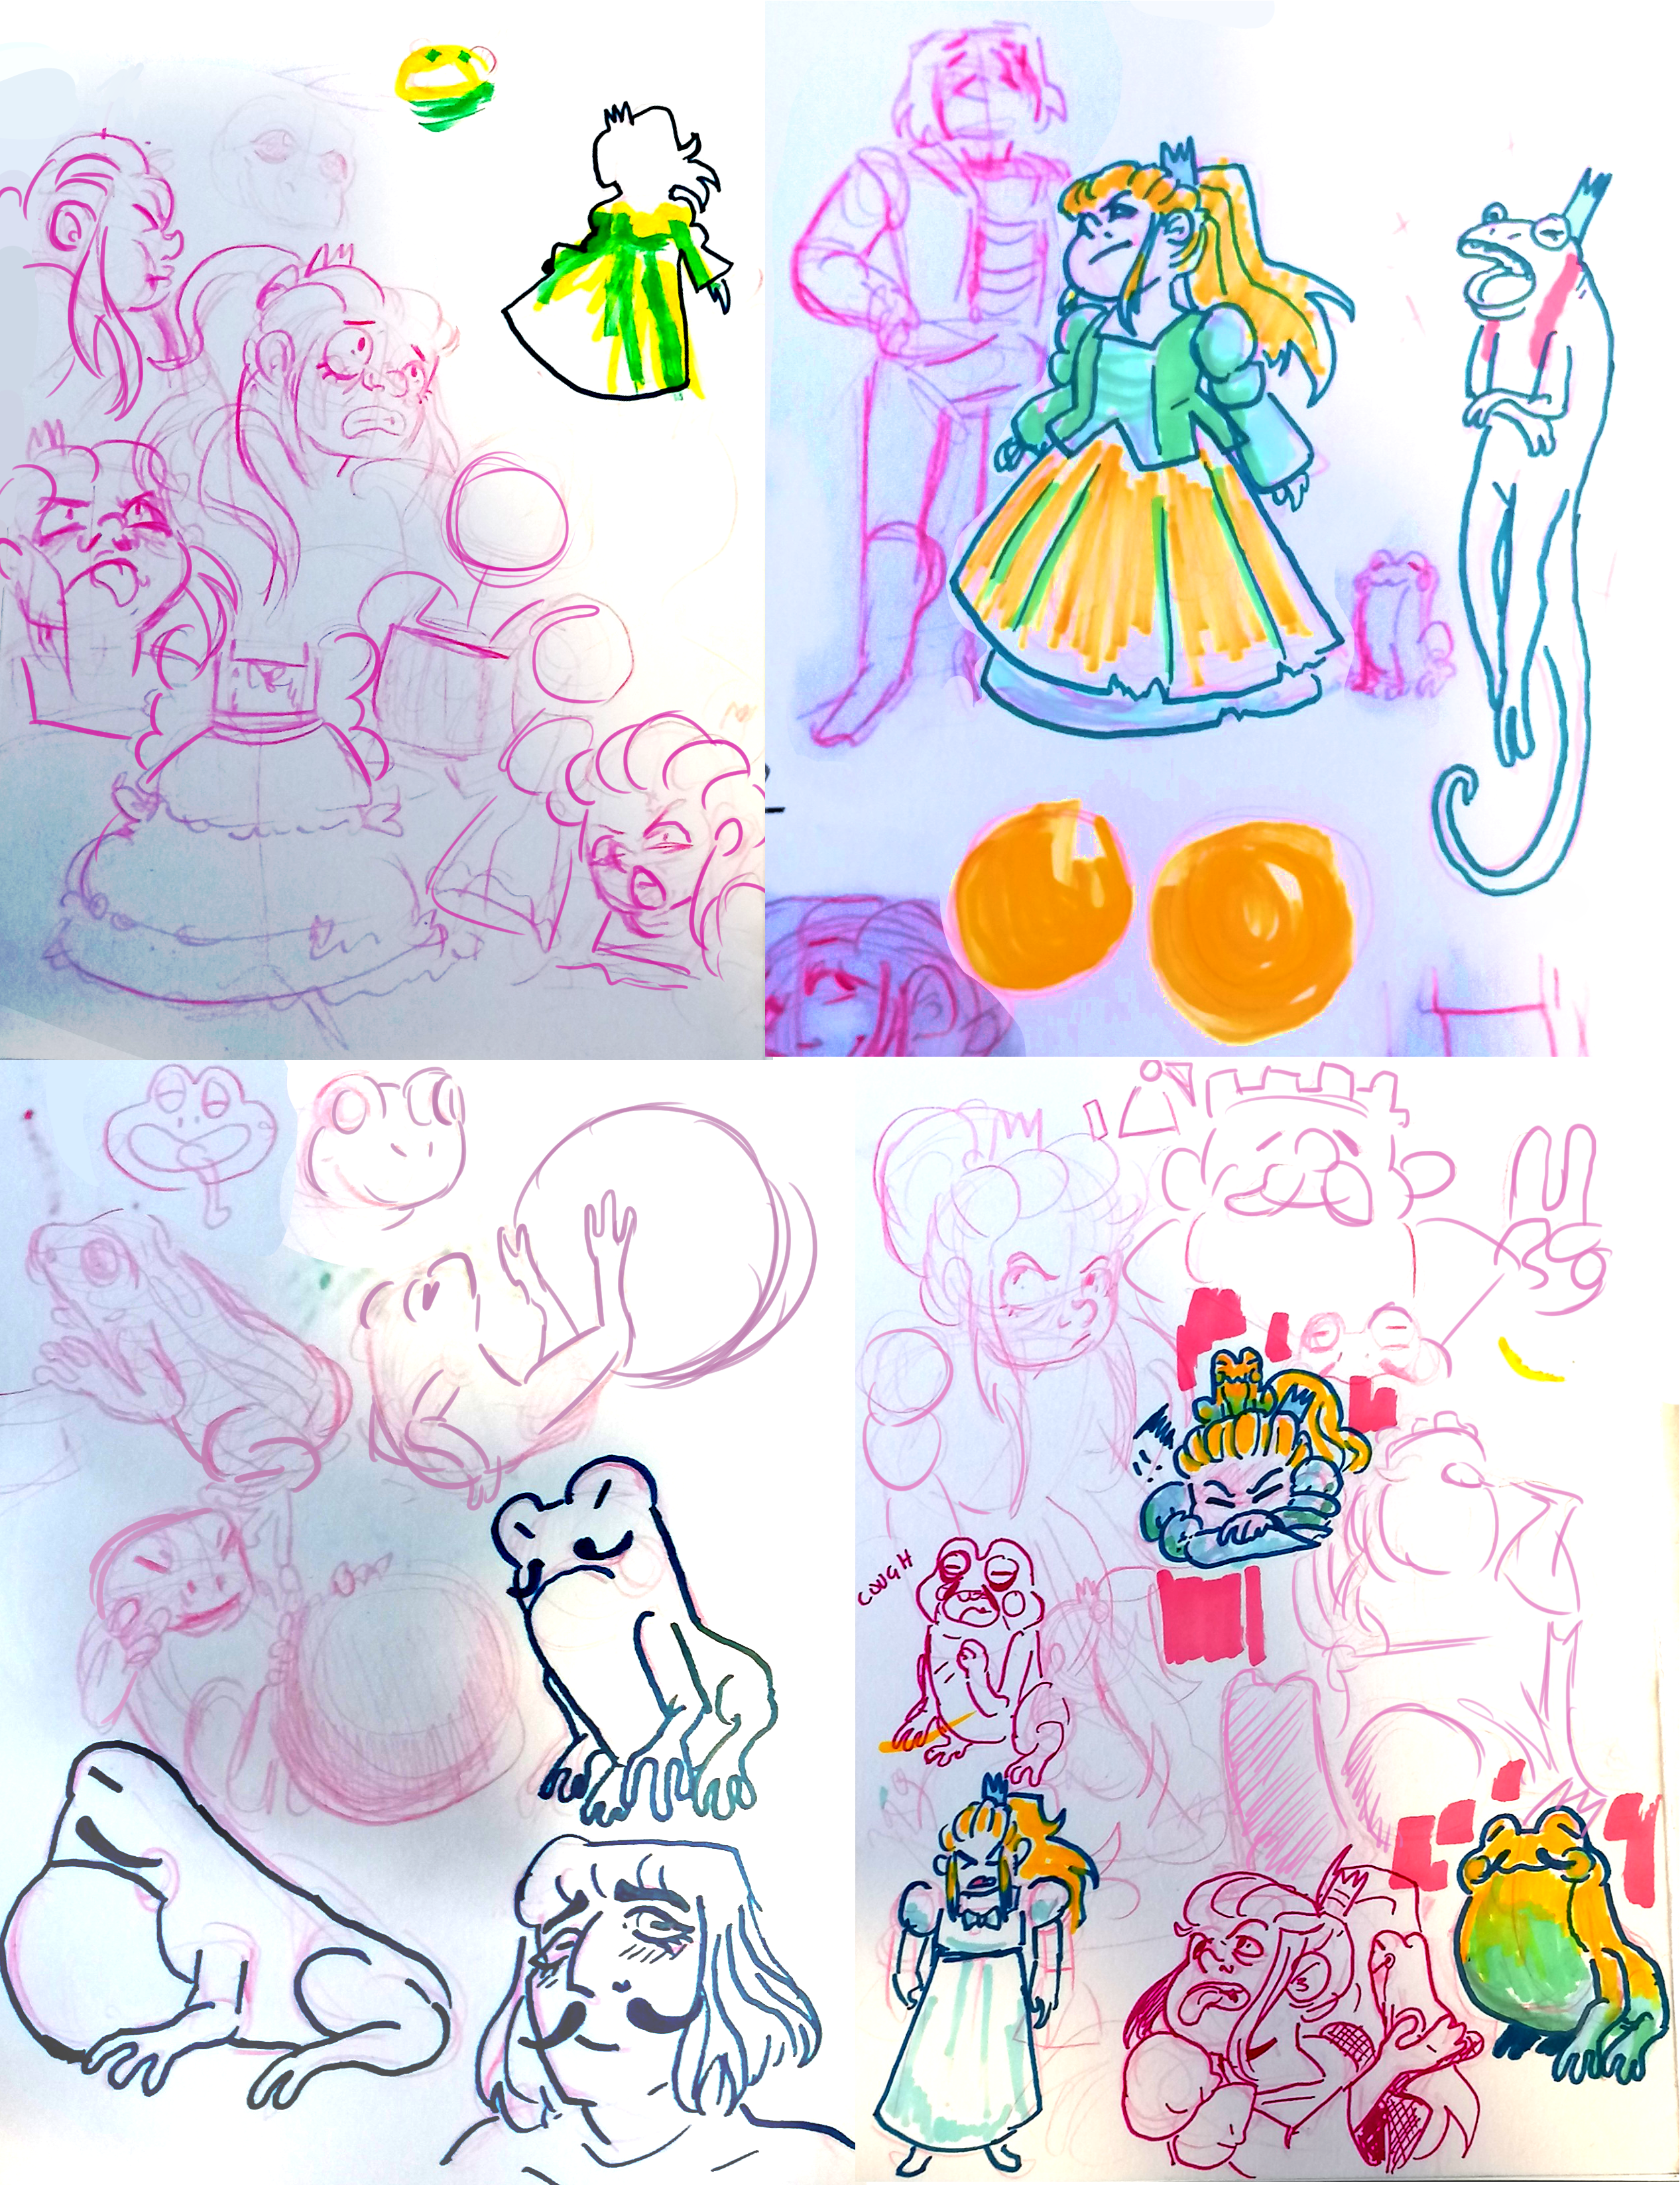
I practiced drawing the characters in the different colour palettes we had planned to make sure they translated well

The Frog was designed with a golden face and blue body like a species of Poison Dart Frog to denote the ending (we even had a draft where he poisoned the princess). We also added a moustache because it's charming
The Princess has a soft face but otherwise is a sharp triangular skirt and a spikey ponytail to show that she's young but very unapproachable and violent. We also made a rule that she can't be drawn without an unpleasant expression on her face.

Stage 4 - Presentation

Describe your image


Describe your image
As a group, we needed to present our story ideas and the designs we had come up with so far. Overall this was a pretty simple stage and I think we did a good job explaining ourselves and were able to pretty evenly distribute the job of talking to the class.
I was responsible for the story breakdown section of the presentation and also made the little colour keys at the top of each of those slides. We had to decide who was doing which section pretty last second since we kept forgetting to discuss it but luckily we were all very happy to do any section and everyone seems happy with the parts they're playing.
Stage 5 - Script and Storyboards
To see my script and Storyboard work from the related classes
The first draft of my script for my section of the comic was based on the page by page breakdown from the presentation.
I split it further into panel by panel descriptions and used colour to separate panels and also highlight dialogue that I'd want in specific panels.
The whole thing is pretty illegible so here's a neater writeup of the script I'm working from.

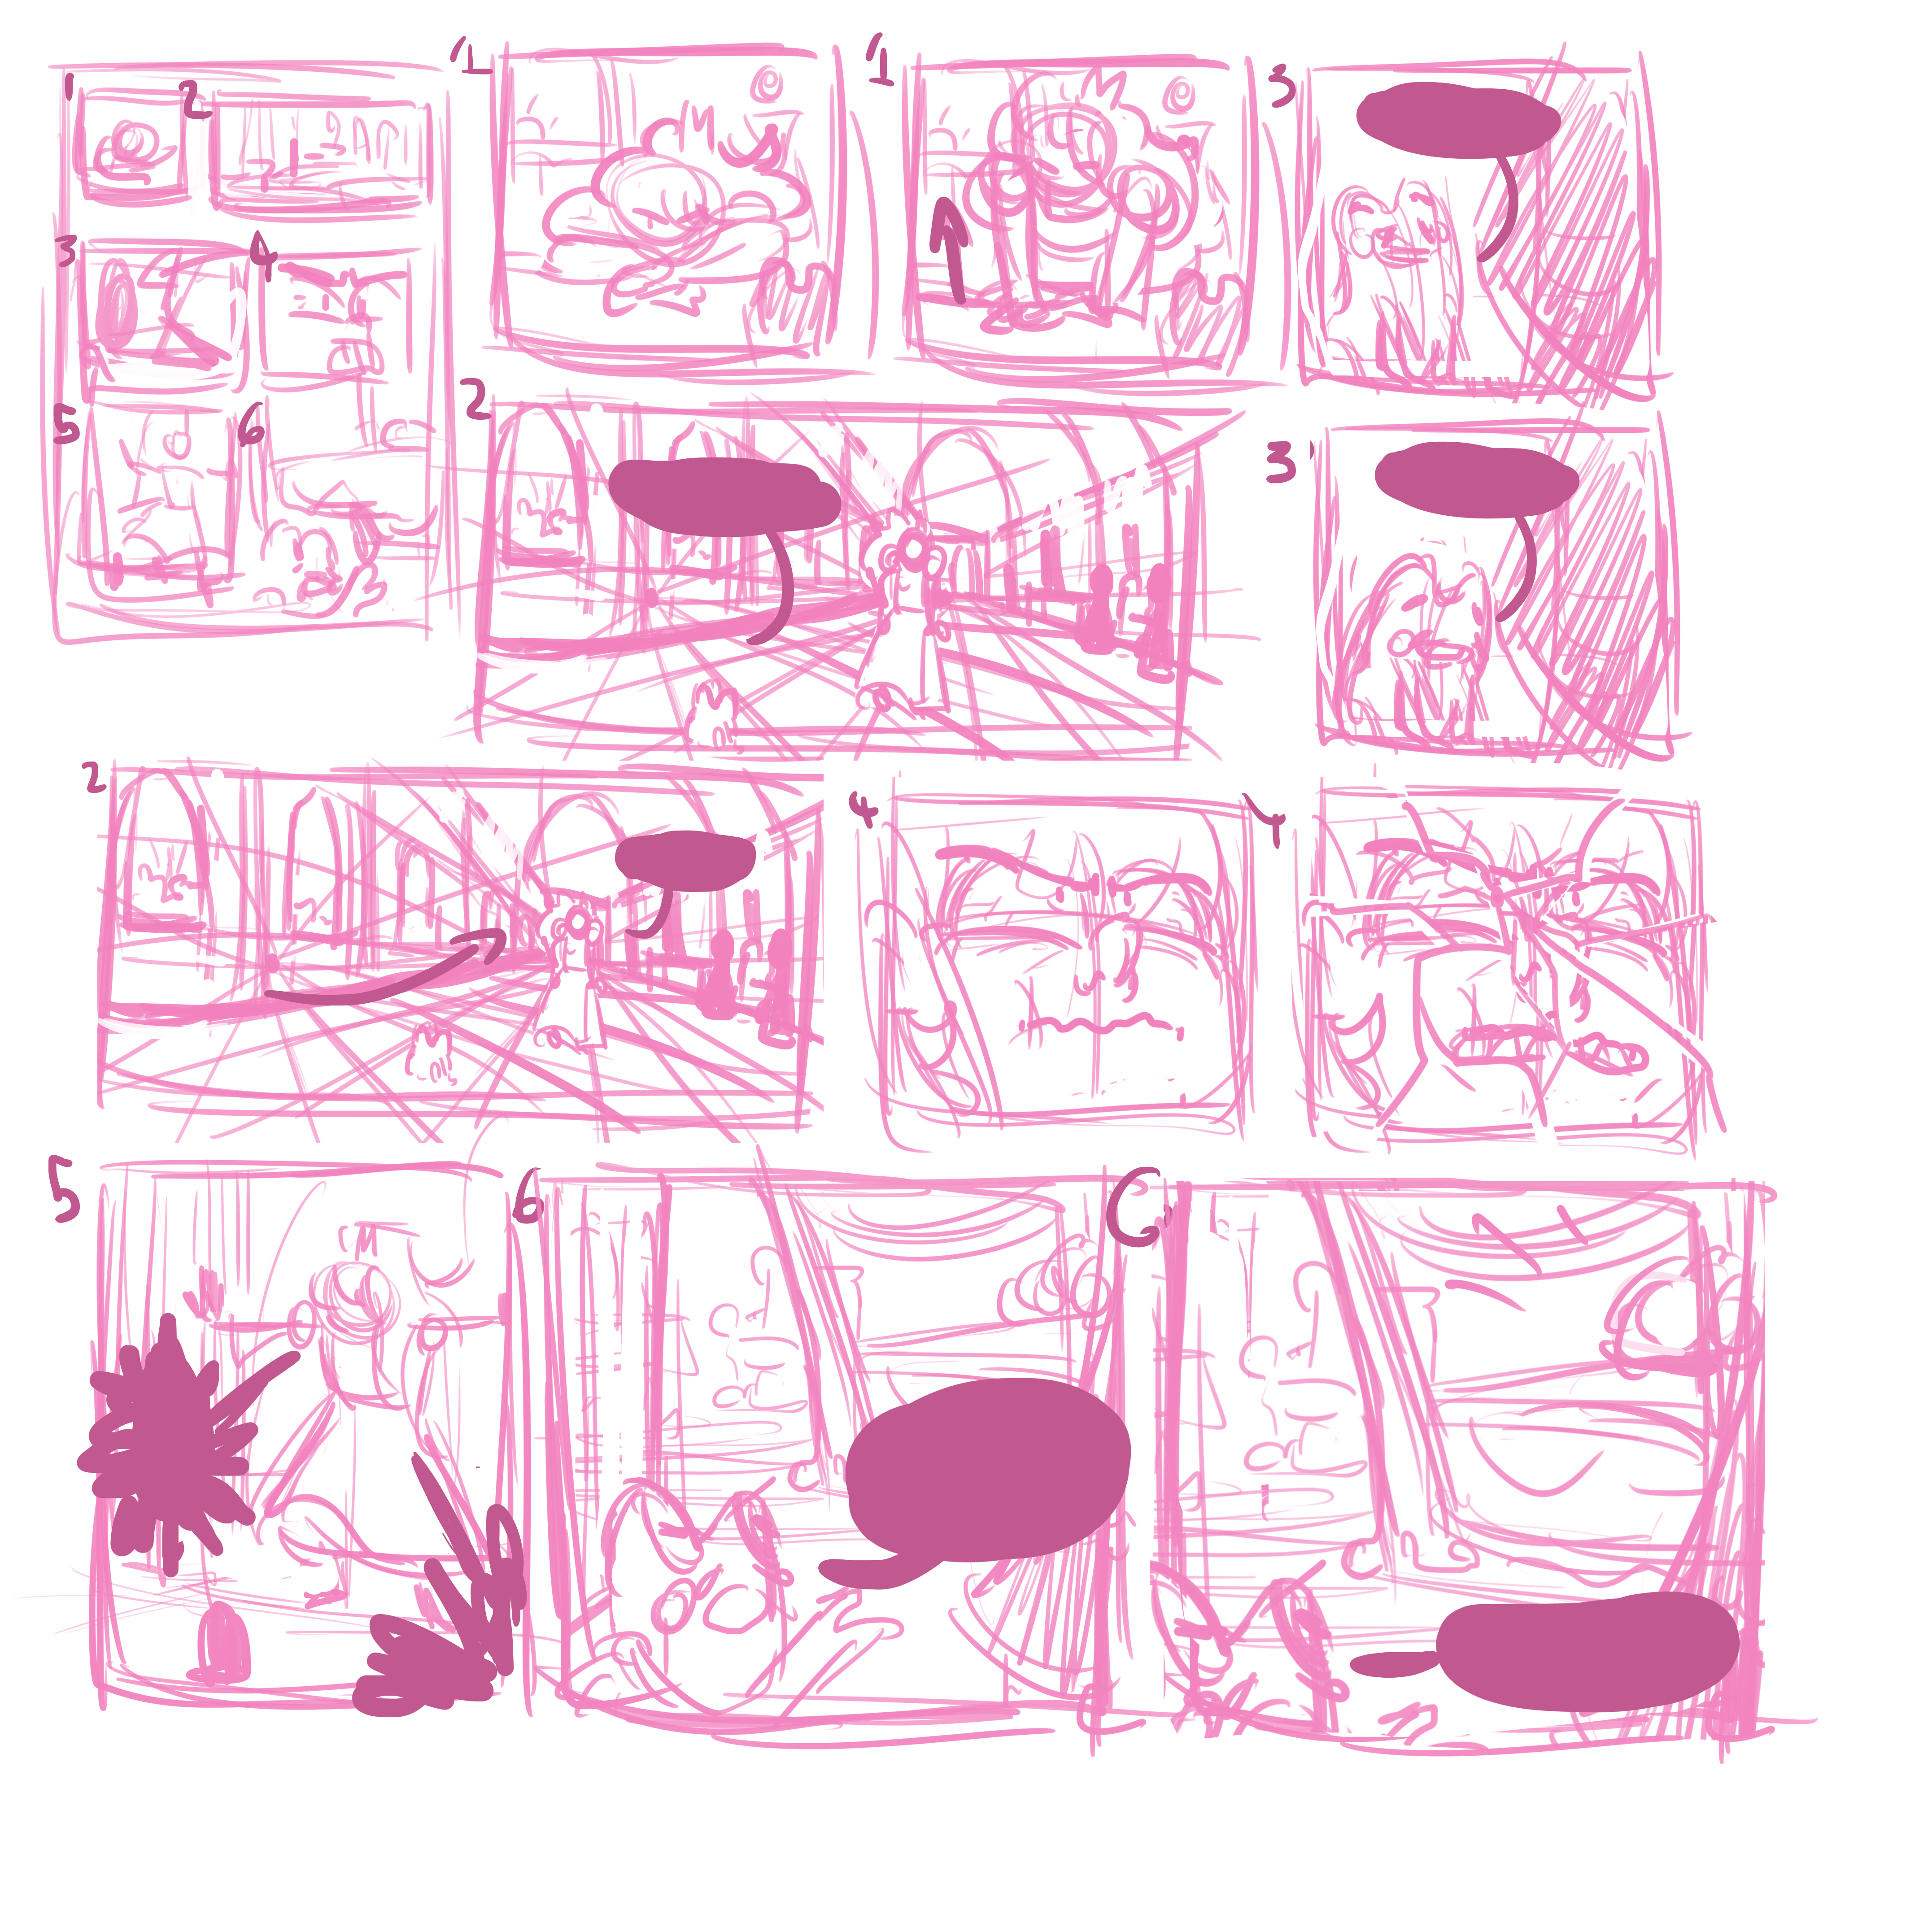
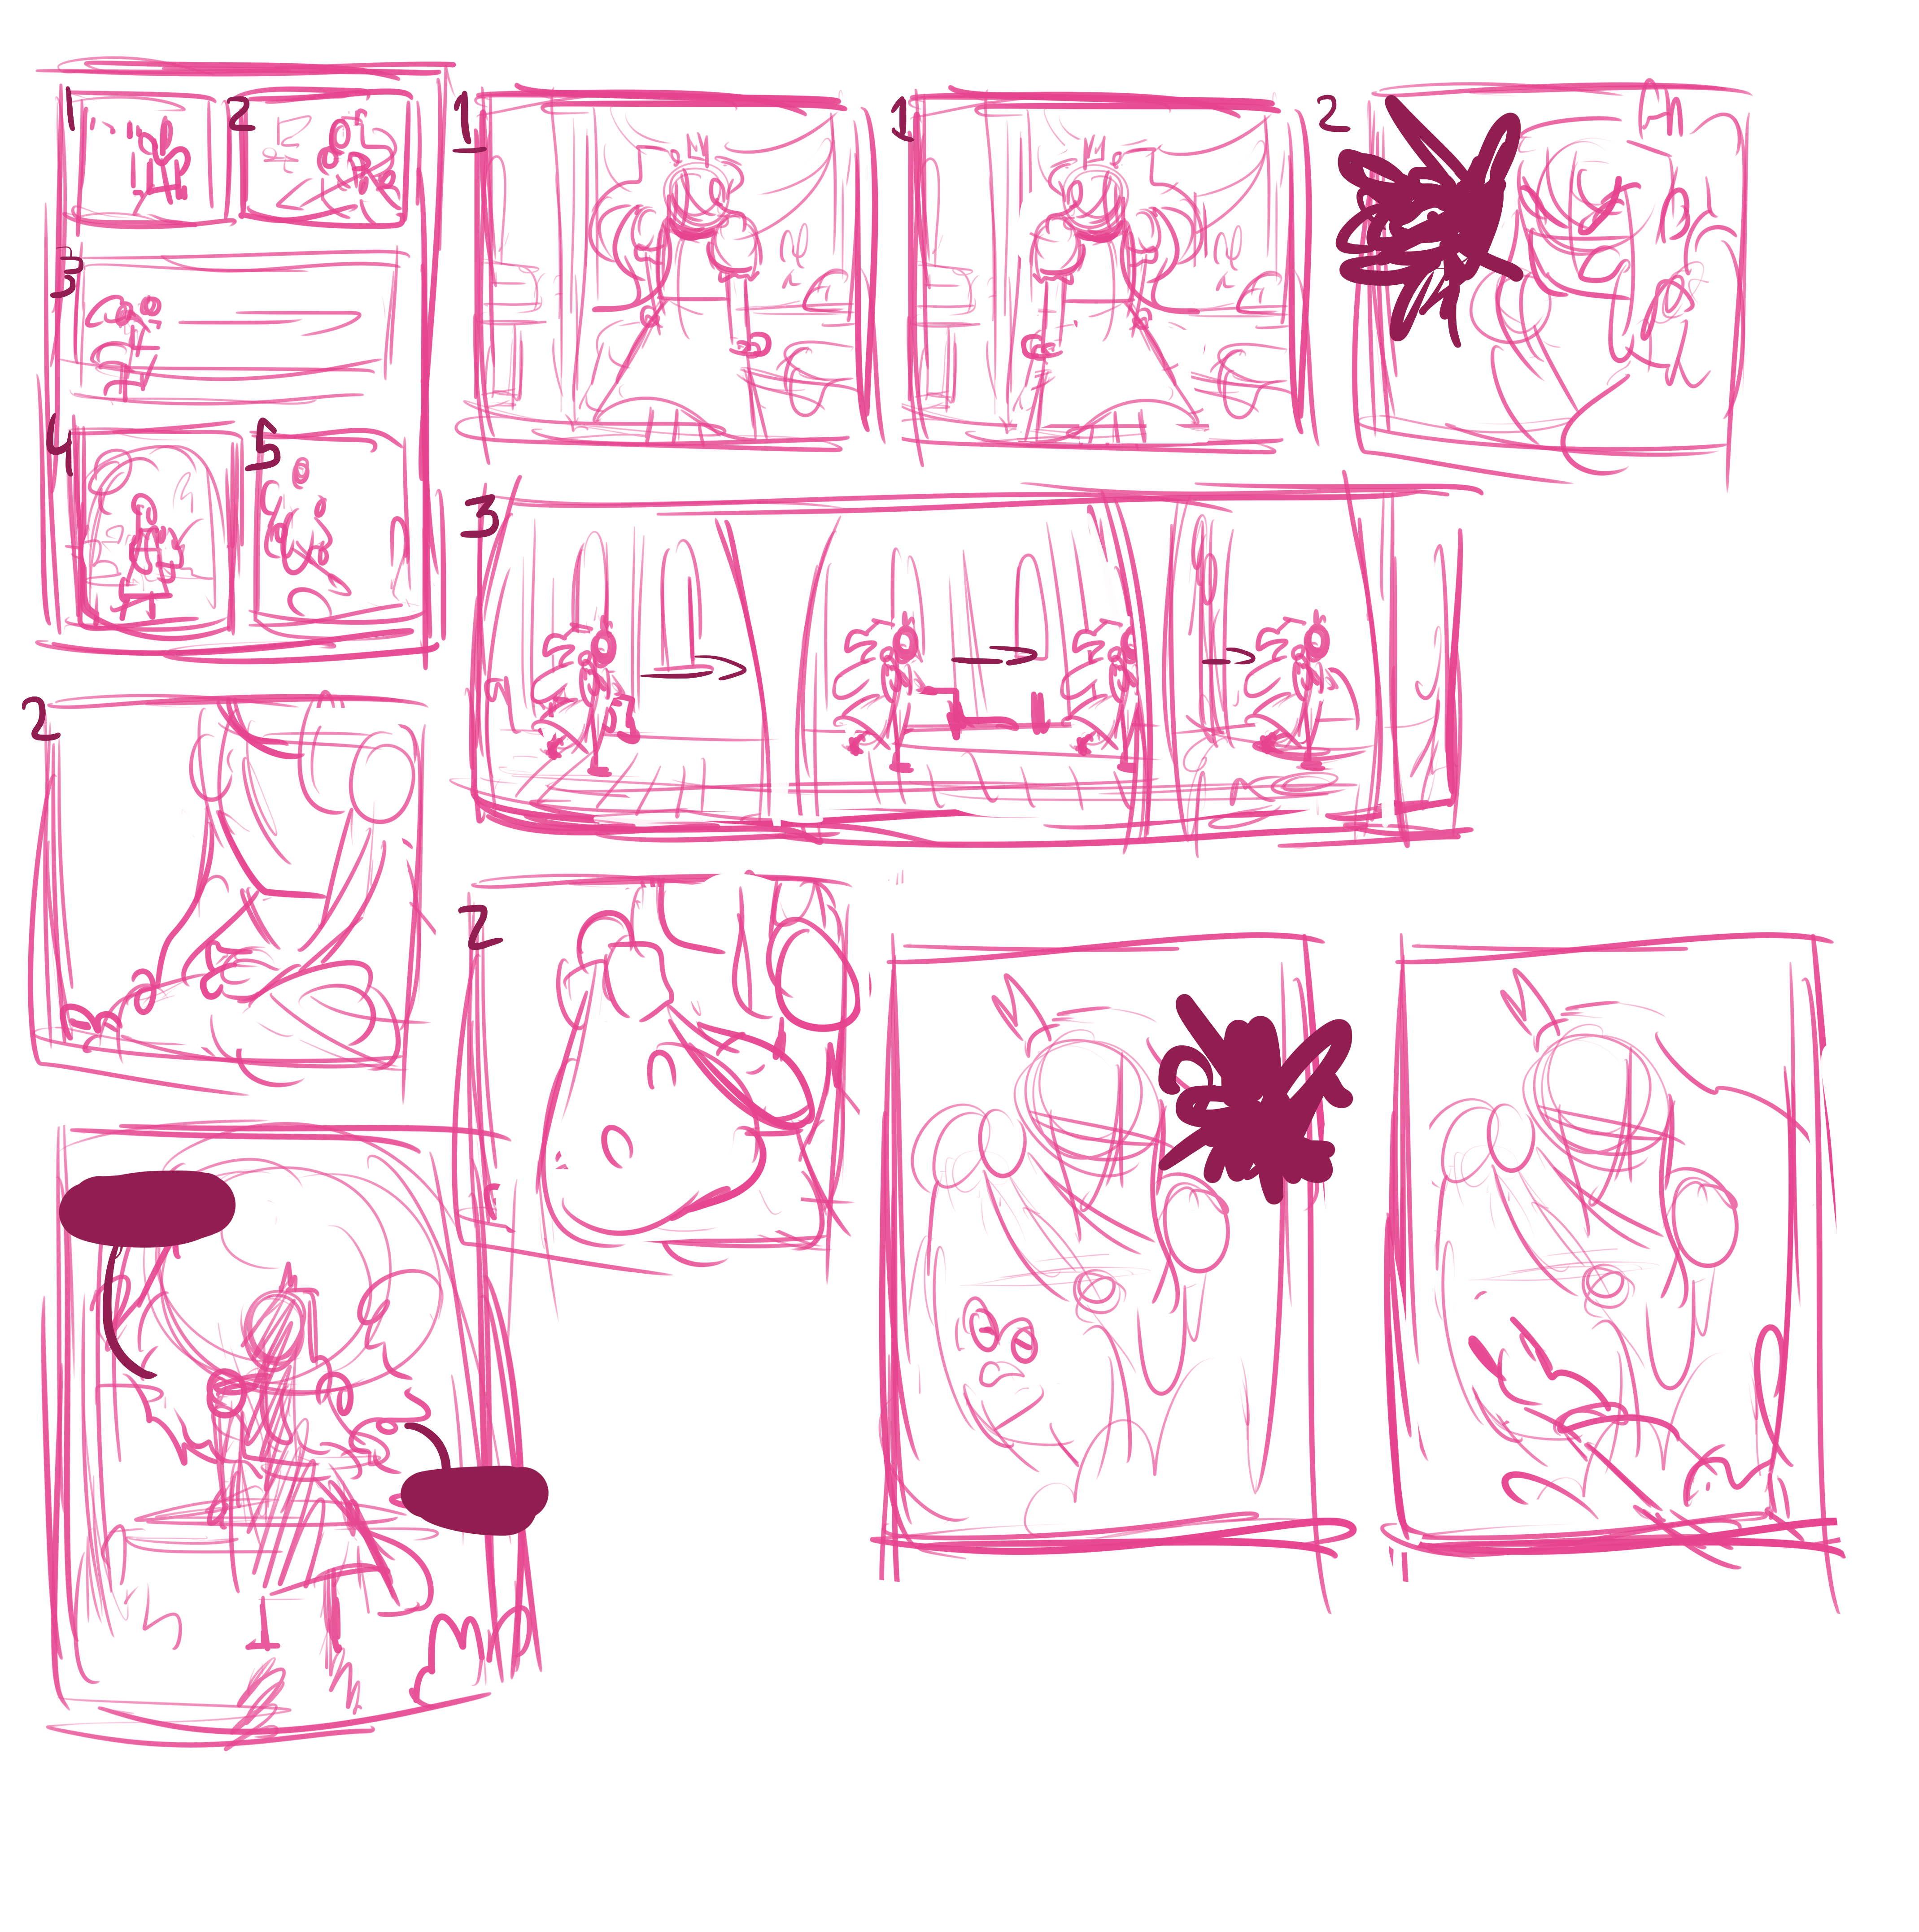
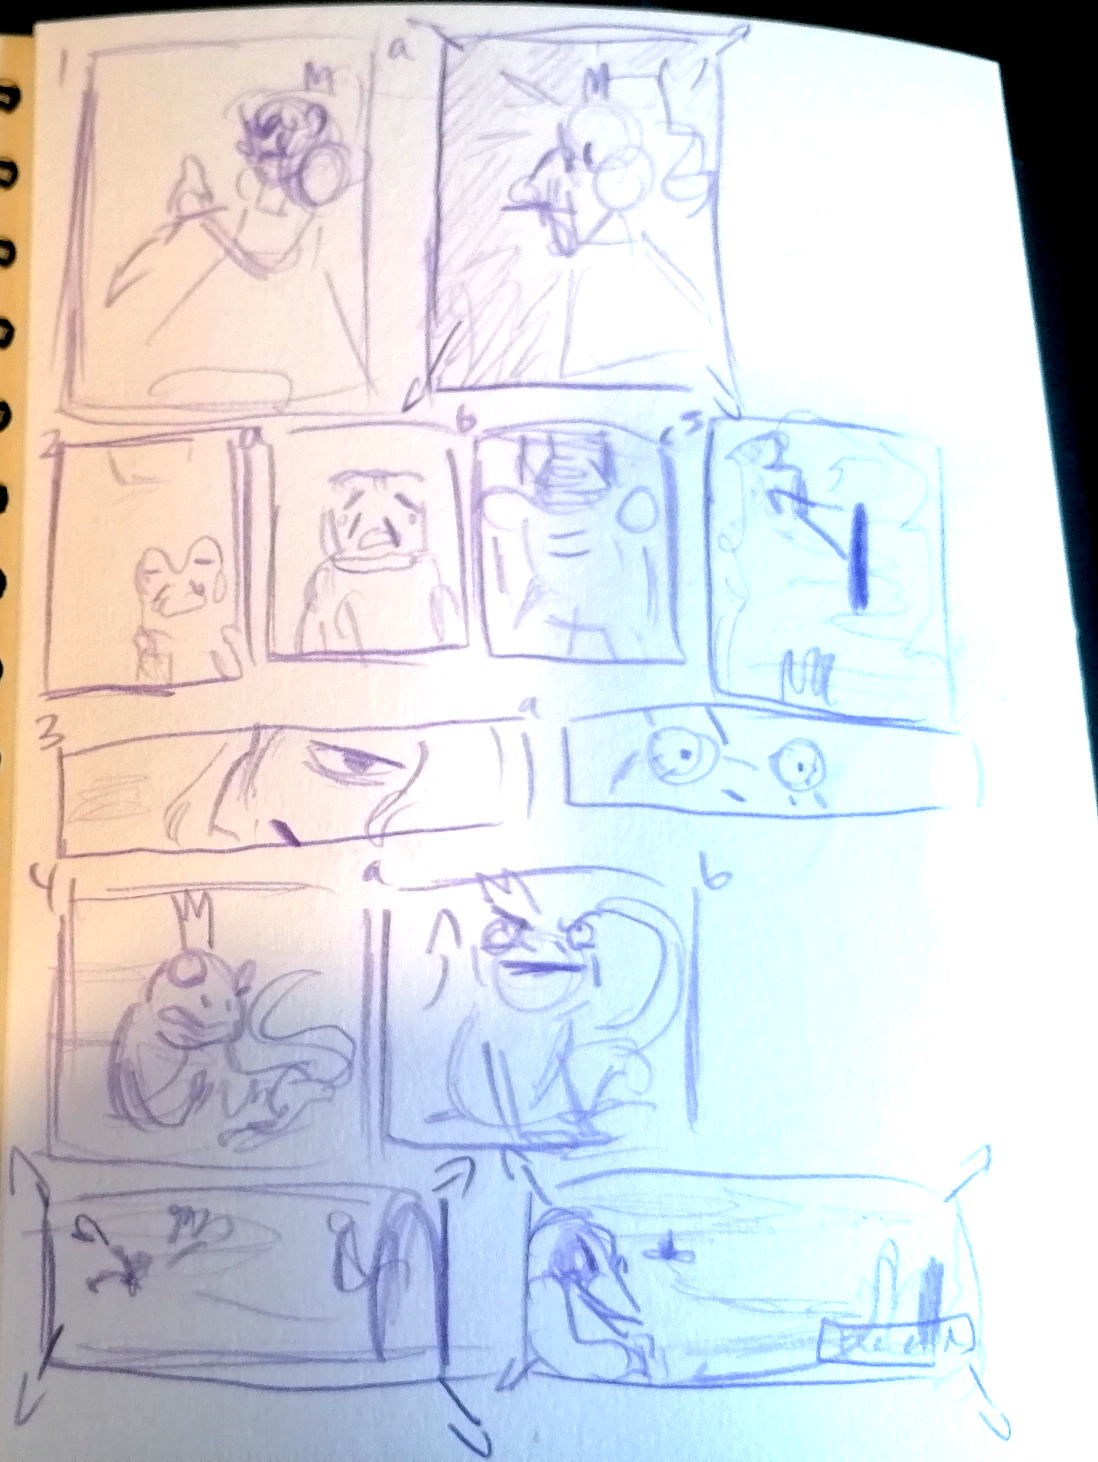
The Storyboards I came up with based on this script are pretty messy but a good point of reference for myself since I'll be the one using them. I numbered the panels to help myself keep track and thumbnailed the overall layout of my pages before going in with specific panel drawings.
One of my favourite concepts I played with is having the final page have a 'panel' that acts as a splash page that the other panels appear on top of in order to give enough weight to the scene where the princess kisses the frog.
I tried my best to keep my plans simple but effective, I have a lot of panels drawn up where the characters either shift between two key poses or have a static 'sprite' on a separate layer from the backdrop so they can be moved around.


Stage 6 - Animation
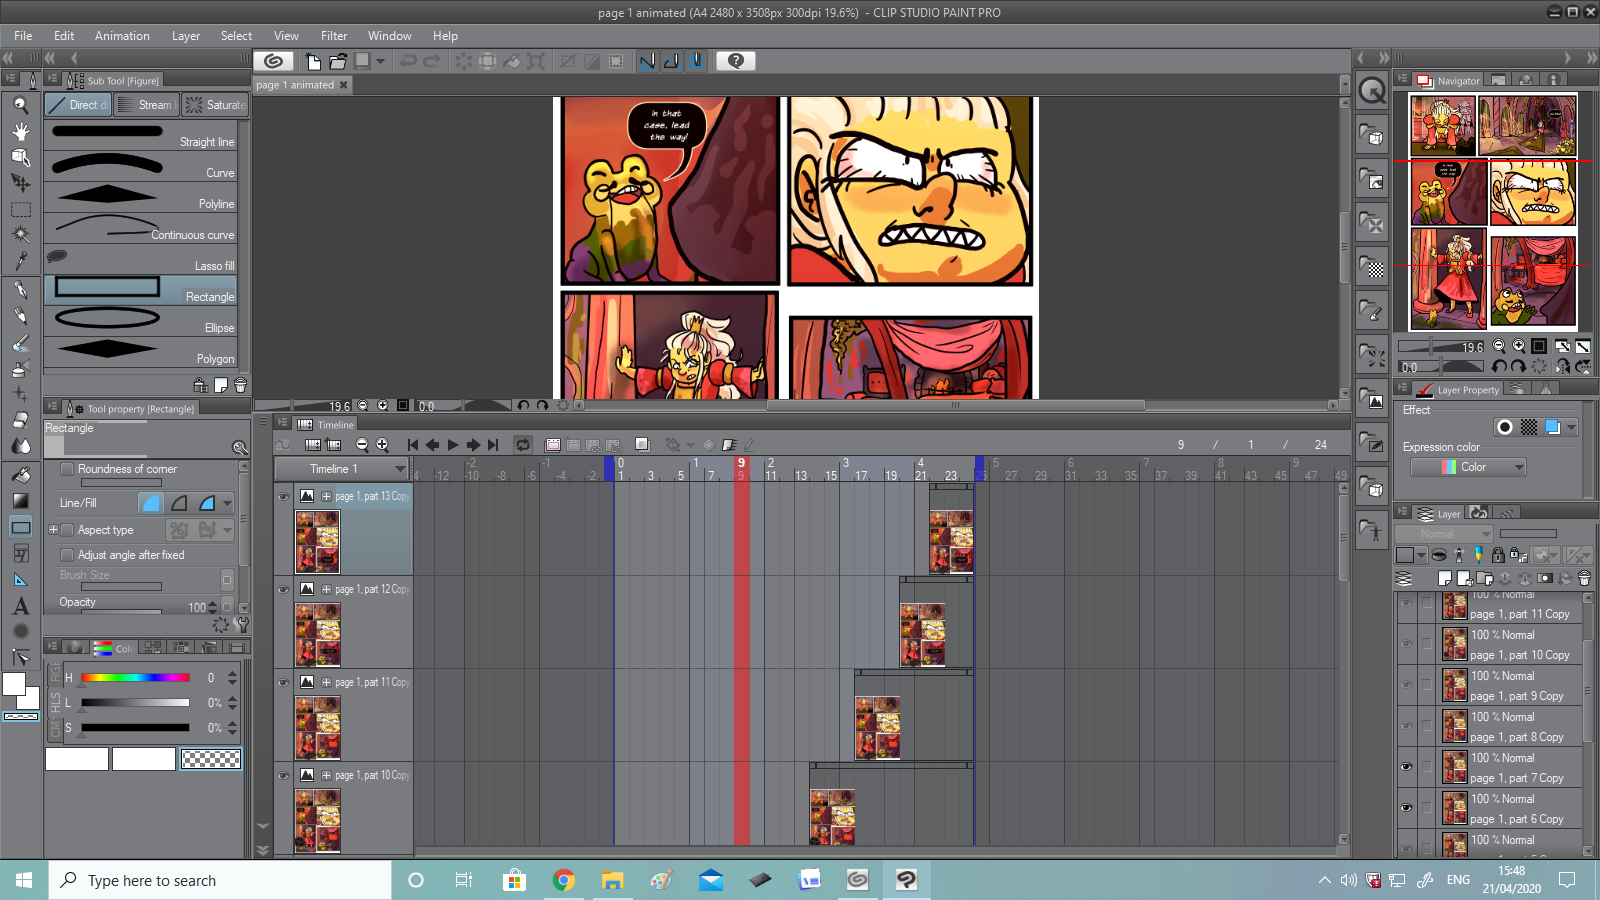
The animation was a tricky topic for this comic. We were originally going to use the software we were shown, Motion artist and perhaps Adobe Animate, but due to access issues, I mainly used my drawing program.
My approach was to take my thumbnails and layer them by panel and keyframe. I drew all the backdrops and then anything that was going to move was put into a folder labeled assets. I was tricky to colour everything cohesively with all the different layers and I had to keep everything well labelled so I wouldn't get confused. There were so many it made my computer lag at times.
Once everything was drawn and the speech bubbles had all been made, I went through each keyframe of the animation and saved them as flat images. It was like a flipbook where I layered on each new panel over all of the old ones, this is especially apparent on page four which used the effect of having new panels showing up on top of the first splash panel to show the transition that happens to the princess.


Stage 7 - Audio
Audio is something I always struggle with. I don't enjoy voice acting and it can be difficult to edit audio. For this project, we were shown how to use the school microphones and given a tutorial on how to use sound editing software. I used a similar software called Audacity for my sound editing since it's simple and free to use and I decided to voice act myself despite it being challenging for me since my alternative was to hire a voice actor.
Once I had my final script fully set up, which took a while since I knew no matter how well I planned my dialogue, there was a chance I'd change it once I saw it on the final comic, I then set aside a day for recording. I felt pretty nervous to record but luckily I don't have a lot of housemates right now so I really tried not to hold back too much with my volume.
I think I was moderately successful and I did attempt to put some emotion into the dialogue even if it's not professional quality by any means. I considered adding some sound effects but due to time constraints, I decided it would work better to have a more consistent end product than to experiment with some sound effects and make the whole thing seem disjointed.